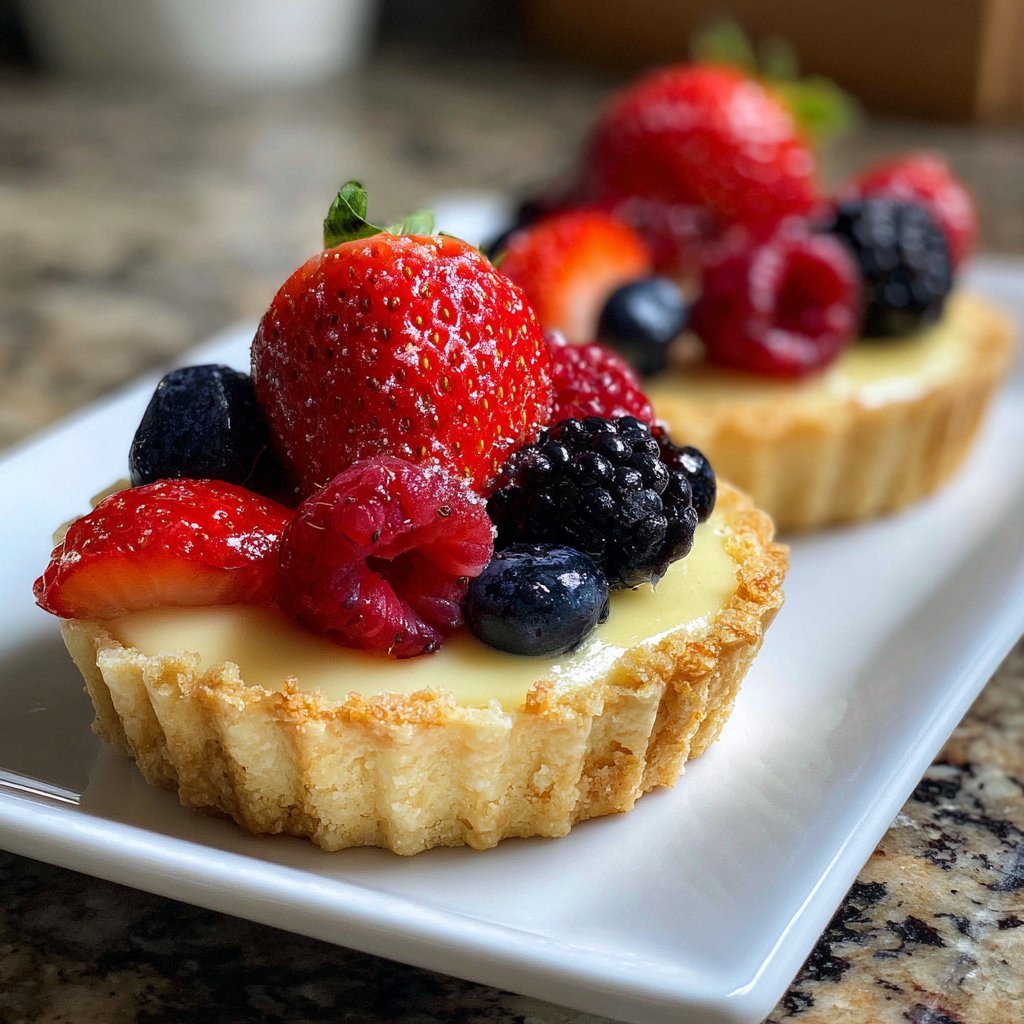
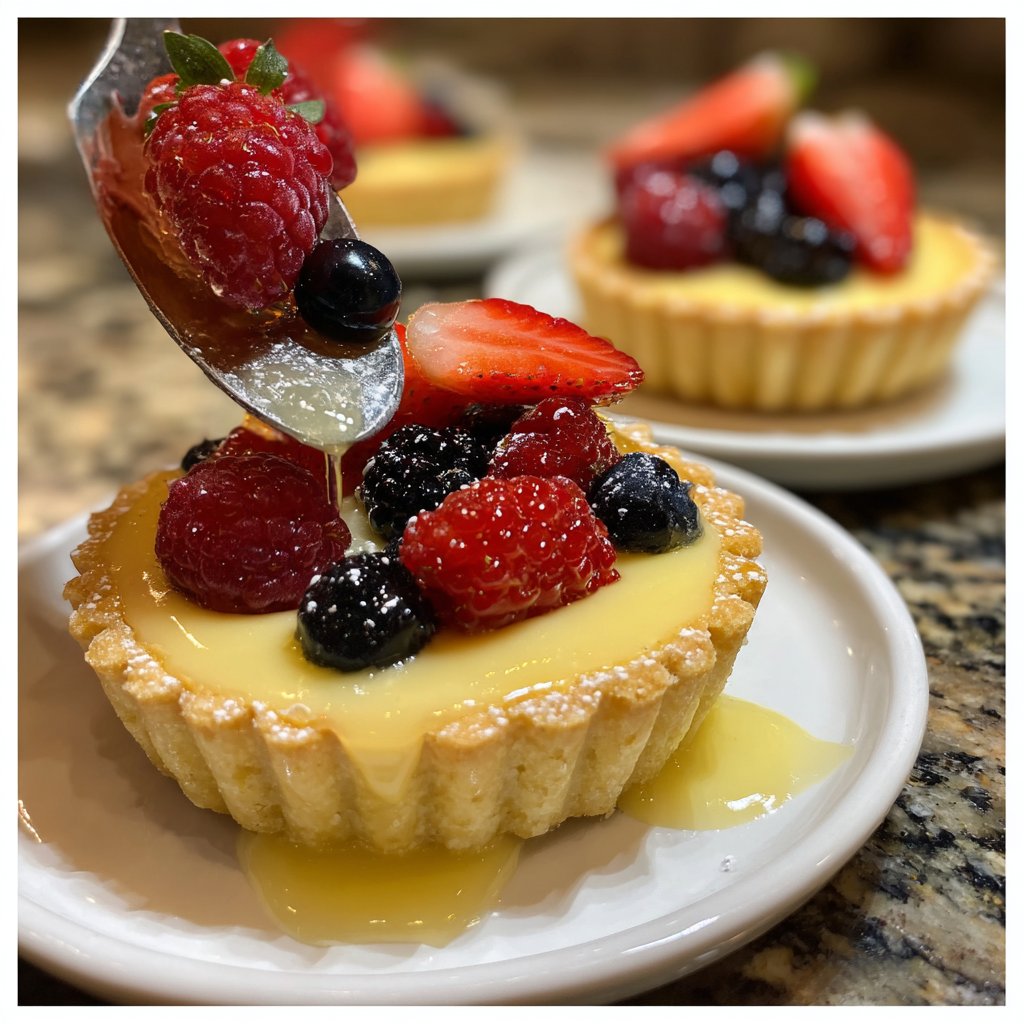
Mini Lemon Tarts with Berries
Highlighted under: Oven Treats
I absolutely love making these Mini Lemon Tarts with Berries! The bright, tangy filling contrasts beautifully with the sweet, fresh berries on top, creating the perfect bite-sized dessert. Each mini tart brings a burst of flavor that’s both refreshing and indulgent. Whether you’re serving them at a party or just treating yourself at home, they are sure to impress. Plus, they are surprisingly easy to make, allowing you to showcase your dessert-making skills with minimal effort!
When I first ventured into making these Mini Lemon Tarts, I was amazed at how quickly they came together. The combination of a buttery crust filled with a zesty lemon curd is a match made in heaven. I found that using fresh lemon juice and zest really enhances the flavor, giving it that vibrant kick that pairs wonderfully with the berries.
One key tip I’d love to share is to let the tarts chill for at least an hour after baking. This not only helps the filling set perfectly but also allows the flavors to meld beautifully. It’s worth the wait, I promise!
Why You Will Love These Mini Lemon Tarts
- Tangy lemon curd balanced with sweet berries
- Delicate crust that's both flaky and buttery
- Perfectly portioned for gatherings or personal indulgence
The Perfect Crust
Achieving a flaky and buttery crust is essential for these Mini Lemon Tarts. The combination of softened unsalted butter and powdered sugar creates a tender texture, while the egg yolk enriches the dough. Be careful not to overwork the mixture; you want it to come together without becoming tough. If your dough crumbles, add more ice water, one tablespoon at a time, until it holds together.
After pressing the dough into the mini tart pans, refrigerating it for 20 minutes is an important step. This helps the fat to solidify, which prevents the crust from shrinking during baking. Keep an eye on your crust while baking; it should turn lightly golden – if it looks dark brown, it might be overbaked and too hard.
Zesty Lemon Filling
The lemon filling is where the magic truly happens. Using fresh lemon juice and zest not only adds bright flavor but also enhances the dessert's aromatic essence. When whisking the lemon filling ingredients, aim for a smooth, glossy consistency before pouring it into the tart shells. Any clumps will result in an uneven texture, so be thorough in your whisking.
Baking the filled tarts requires attention too; they should be removed from the oven when the edges are set but the center still slightly jiggles. This indicates that the filling will firm up as it cools, resulting in a silky texture. If you accidentally bake them too long, they may dry out and lose their luxurious creaminess.
Ingredients
Ingredients
For the Tart Crust
- 1 1/2 cups all-purpose flour
- 1/2 cup unsalted butter, softened
- 1/4 cup powdered sugar
- 1/4 teaspoon salt
- 1 egg yolk
- 2-3 tablespoons ice water
For the Lemon Filling
- 1/2 cup fresh lemon juice
- 1 tablespoon lemon zest
- 1/2 cup granulated sugar
- 2 large eggs
- 1/4 cup heavy cream
For Garnish
- 1 cup mixed fresh berries (strawberries, blueberries, raspberries)
- Mint leaves for decoration (optional)
Instructions
Instructions
Prepare the Crust
In a mixing bowl, combine flour, butter, powdered sugar, and salt. Work the mixture until it resembles coarse crumbs. Add the egg yolk and ice water, mixing until a dough forms. Press the dough into mini tart pans and refrigerate for 20 minutes.
Bake the Crust
Preheat the oven to 375°F (190°C). Bake the crusts for about 15 minutes or until lightly golden. Remove from the oven and let them cool.
Make the Lemon Filling
In a bowl, whisk together lemon juice, lemon zest, sugar, eggs, and cream until well combined. Pour the filling into the cooled tart shells.
Bake the Tarts
Bake the filled tarts for 12-15 minutes until the filling is set but slightly jiggly in the center. Allow to cool completely.
Garnish and Serve
Top the cooled tarts with fresh berries and optionally decorate with mint leaves. Serve chilled or at room temperature.
Pro Tips
- For added depth of flavor, consider adding a pinch of salt to the lemon filling. It helps enhance the lemon taste and balances the sweetness.
Make-Ahead Tips
These Mini Lemon Tarts can be made ahead of time, making them perfect for entertaining. The tart crusts can be baked and stored in an airtight container for up to two days. Just wait to fill them until you’re ready to serve; this keeps the crust crispy and avoids sogginess from the lemon filling.
The lemon filling can also be prepared a day in advance and stored in the refrigerator until you are ready to pour it into the cooled crusts. Just give it a good whisk before using to ensure it is smooth and well combined.
Serving Suggestions
These tarts shine beautifully with a variety of fresh berries, but feel free to mix it up! Consider using seasonal fruits like peaches or mango for a unique twist. You can also experiment with flavored whipped cream or a dusting of edible flowers for an elegant touch at special events.
For a delicious variation, try incorporating herbs, such as basil or thyme, into the filling for an herbal note that complements the citrus. This creative touch can elevate your tarts and surprise your guests with unexpected flavor combinations.
Questions About Recipes
→ Can I use store-bought pastry for the crust?
Yes, store-bought pastry works well if you're short on time!
→ How long can I keep the tarts?
The tarts are best enjoyed fresh but can be stored in the refrigerator for up to 3 days.
→ Can I use other fruits as toppings?
Absolutely! Feel free to use any fresh fruits you like, such as kiwi or peaches.
→ Is it possible to make the filling ahead of time?
Yes, you can prepare the filling a day in advance and store it in the refrigerator until you're ready to bake.
Mini Lemon Tarts with Berries
Created by: The Chefliurecipes Team
Recipe Type: Oven Treats
Skill Level: Beginner
Final Quantity: 12 tarts
What You'll Need
For the Tart Crust
- 1 1/2 cups all-purpose flour
- 1/2 cup unsalted butter, softened
- 1/4 cup powdered sugar
- 1/4 teaspoon salt
- 1 egg yolk
- 2-3 tablespoons ice water
For the Lemon Filling
- 1/2 cup fresh lemon juice
- 1 tablespoon lemon zest
- 1/2 cup granulated sugar
- 2 large eggs
- 1/4 cup heavy cream
For Garnish
- 1 cup mixed fresh berries (strawberries, blueberries, raspberries)
- Mint leaves for decoration (optional)
How-To Steps
In a mixing bowl, combine flour, butter, powdered sugar, and salt. Work the mixture until it resembles coarse crumbs. Add the egg yolk and ice water, mixing until a dough forms. Press the dough into mini tart pans and refrigerate for 20 minutes.
Preheat the oven to 375°F (190°C). Bake the crusts for about 15 minutes or until lightly golden. Remove from the oven and let them cool.
In a bowl, whisk together lemon juice, lemon zest, sugar, eggs, and cream until well combined. Pour the filling into the cooled tart shells.
Bake the filled tarts for 12-15 minutes until the filling is set but slightly jiggly in the center. Allow to cool completely.
Top the cooled tarts with fresh berries and optionally decorate with mint leaves. Serve chilled or at room temperature.
Extra Tips
- For added depth of flavor, consider adding a pinch of salt to the lemon filling. It helps enhance the lemon taste and balances the sweetness.
Nutritional Breakdown (Per Serving)
- Calories: 200 kcal
- Total Fat: 14g
- Saturated Fat: 8g
- Cholesterol: 100mg
- Sodium: 50mg
- Total Carbohydrates: 20g
- Dietary Fiber: 1g
- Sugars: 10g
- Protein: 2g