Bear Paw Graduation Cake
Highlighted under: Oven Treats
When I first heard about the Bear Paw Graduation Cake, I couldn’t resist the creative concept of combining my love for baking with a unique theme. This cake is not only visually stunning, resembling a bear paw, but also deliciously indulgent. I love how you can personalize it with your favorite flavors and decorations to truly make it your own. It’s perfect for celebrating this special milestone, and it always gets rave reviews from friends and family. Let’s dive into this fun and memorable cake that will surely be the highlight of any graduation party!

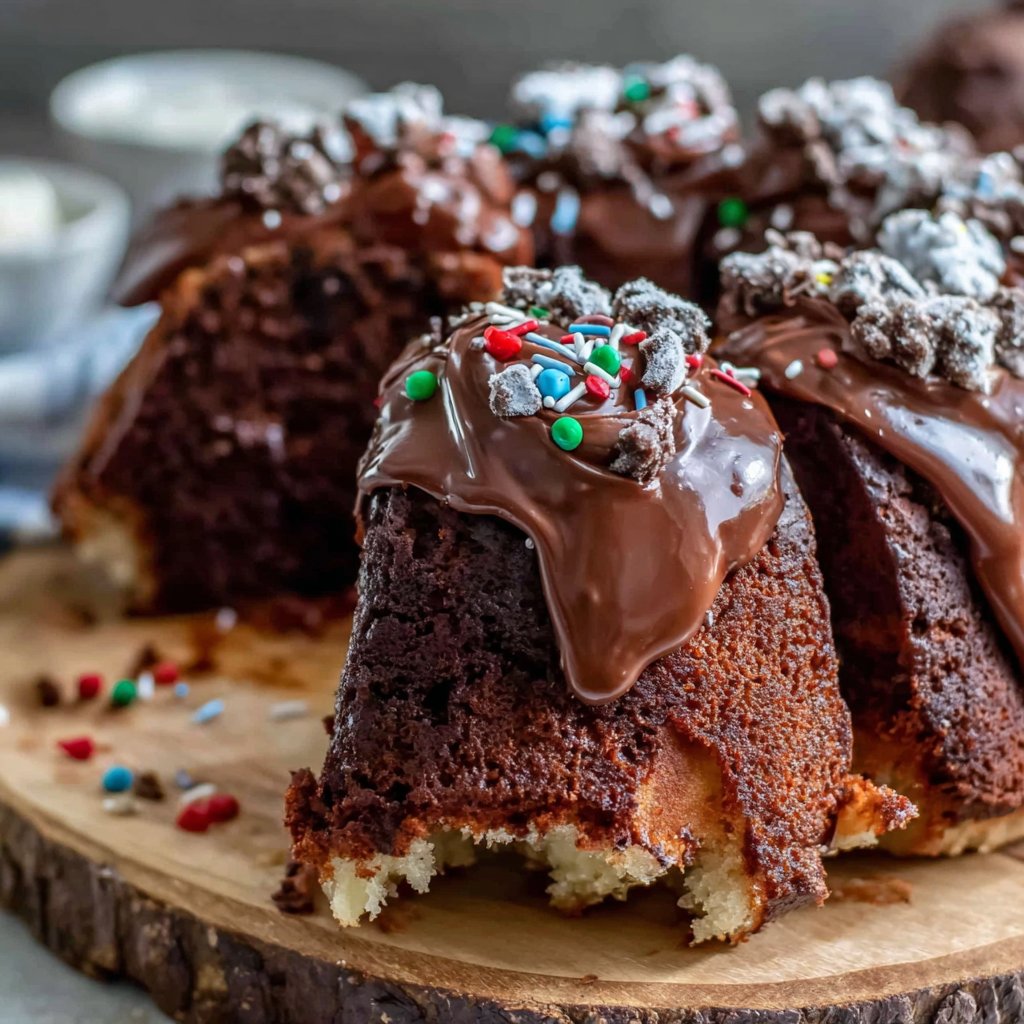
Creating the Bear Paw Graduation Cake was a delightful journey. I started by experimenting with different cake flavors, settling on chocolate and vanilla layers to appeal to everyone. The key to achieving that bear paw look is to mold the cake perfectly and use rich frosting to give it depth. I found that using a combination of fondant and chocolate melts helped me shape the paw pads effectively.
One memorable moment was watching my friends' faces light up when they saw the cake for the first time. Adding little graduation caps as cake toppers gave it a special touch. For anyone trying this cake, I suggest practicing the paw design separately to make the assembly smoother. It’s all about fun and creativity!
Why You Will Love This Cake
- Unique and creative bear paw design that wows guests
- Rich flavor that combines chocolate and vanilla layers
- Perfect for graduation celebrations or any special occasion
Creating the Perfect Bear Paw Shape
Carving the cake into the distinctive bear paw shape is a crucial step in achieving the desired look. Once your cake layers have cooled completely, use a serrated knife for better control and a smooth finish. Aim to create rounded edges for the 'fingers' of the paw, ensuring that the center of the cake is slightly thicker for balance. Take your time with this step, as a well-carved cake will not only look impressive but will enhance the overall presentation.
If you're worried about the cake crumbling while shaping, consider chilling it in the refrigerator for about 30 minutes before carving. This firming up allows for easier handling. Remember, you can always trim a little more if needed, but you can't add back—so make small, gradual cuts to achieve the perfect paw shape.
Expert Frosting Techniques
To achieve a smooth and aesthetically pleasing frosting finish, start by applying a crumb coat—a thin layer of frosting that seals in any cake crumbs. This layer prevents stray crumbs from showing in your final coat. Refrigerate your cake for about 20 minutes after applying the crumb coat; this helps set the layer and makes it easier to frost smoothly with the final layer of chocolate frosting.
Using a bench scraper or an offset spatula can help you create clean, sharp edges when frosting the cake. To enhance texture and depth for the bear paw design, you can dollop some frosting on the top of the paw and gently spread it towards the edges, creating a soft, rounded appearance that mimics the natural look of a bear paw.
Ingredients
For the Cake Layers
- 2 cups all-purpose flour
- 2 cups granulated sugar
- 1 cup unsweetened cocoa powder
- 1 tablespoon baking powder
- 1 teaspoon baking soda
- 1 teaspoon salt
- 2 large eggs
- 1 cup milk
- 1 cup vegetable oil
- 2 teaspoons vanilla extract
- 1 cup boiling water
For the Frosting
- 1 cup unsalted butter, softened
- 4 cups powdered sugar
- 1/2 cup cocoa powder
- 1/4 cup milk
- 1 teaspoon vanilla extract
For Decoration
- Chocolate melts
- Brown fondant
- Graduation cap toppers
Steps
Prepare the Cake Batter
Preheat the oven to 350°F (175°C). Grease and flour two 9-inch round cake pans. In a large bowl, mix together the dry ingredients, then add the eggs, milk, oil, and vanilla. Slowly stir in the boiling water until combined.
Bake the Cake Layers
Divide the batter evenly between the prepared pans. Bake for 30 minutes or until a toothpick comes out clean. Let them cool in the pans for 10 minutes before transferring to a wire rack to cool completely.
Make the Frosting
In a mixing bowl, beat the softened butter until creamy. Gradually add the powdered sugar and cocoa powder, alternating with milk, beating until smooth and fluffy. Mix in the vanilla extract.
Assemble the Cake
Once the cake layers are completely cool, place one layer on a serving plate. Spread a layer of frosting on top, then place the second layer on top. Frost the entire cake generously.
Shape the Bear Paw
Using a knife, gently carve the cake into a paw shape. Use the frosting to create depth and add the chocolate melts and fondant pieces to form the paw pads.
Decorate and Serve
Add the graduation caps on top and any additional decorations. Slice and serve to your guests, enjoying all the smiles!
Pro Tips
- For extra flavor, consider adding a dash of espresso powder to the chocolate batter. This enhances the chocolate flavor without being overpowering.
Ingredient Substitutions
If you're looking to make a lighter version of the Bear Paw Graduation Cake, you can substitute the all-purpose flour with a gluten-free blend. Just ensure it's a one-to-one substitution for the best results. However, do keep in mind that the texture may vary slightly—gluten-free flours often yield a denser cake, so don’t overmix to avoid toughness.
For a dairy-free version, replace the milk with almond or coconut milk and use a dairy-free margarine in your frosting. This will maintain the rich flavors while accommodating dietary restrictions without compromising on taste.
Storage and Make-Ahead Tips
This cake can be made in advance and stored for up to three days in an airtight container at room temperature. If you're preparing it further ahead of time, consider freezing the unassembled cake layers—wrap each layer individually in plastic wrap and aluminum foil before placing them in the freezer. They can last up to three months, and when you're ready, simply thaw them in the refrigerator overnight.
After frosting, it's best to enjoy the cake fresh, but if you have leftovers, store them in the fridge. Allow it to come to room temperature before serving to experience the best flavors and textures, especially with the rich chocolate frosting.
Questions About Recipes
→ Can I make this cake in advance?
Yes, you can bake the layers a day ahead and keep them in the refrigerator, wrapped tightly in plastic wrap.
→ What can I substitute for the eggs?
You can use flaxseed meal mixed with water or applesauce as an egg substitute.
→ How can I store leftovers?
Store leftover cake in an airtight container at room temperature for up to 3 days, or refrigerate for up to a week.
→ Can I use different flavors for the cake layers?
Absolutely! Feel free to experiment with vanilla, red velvet, or any flavor you love.
Bear Paw Graduation Cake
Created by: The Chefliurecipes Team
Recipe Type: Oven Treats
Skill Level: Intermediate
Final Quantity: 10 servings
What You'll Need
For the Cake Layers
- 2 cups all-purpose flour
- 2 cups granulated sugar
- 1 cup unsweetened cocoa powder
- 1 tablespoon baking powder
- 1 teaspoon baking soda
- 1 teaspoon salt
- 2 large eggs
- 1 cup milk
- 1 cup vegetable oil
- 2 teaspoons vanilla extract
- 1 cup boiling water
For the Frosting
- 1 cup unsalted butter, softened
- 4 cups powdered sugar
- 1/2 cup cocoa powder
- 1/4 cup milk
- 1 teaspoon vanilla extract
For Decoration
- Chocolate melts
- Brown fondant
- Graduation cap toppers
How-To Steps
Preheat the oven to 350°F (175°C). Grease and flour two 9-inch round cake pans. In a large bowl, mix together the dry ingredients, then add the eggs, milk, oil, and vanilla. Slowly stir in the boiling water until combined.
Divide the batter evenly between the prepared pans. Bake for 30 minutes or until a toothpick comes out clean. Let them cool in the pans for 10 minutes before transferring to a wire rack to cool completely.
In a mixing bowl, beat the softened butter until creamy. Gradually add the powdered sugar and cocoa powder, alternating with milk, beating until smooth and fluffy. Mix in the vanilla extract.
Once the cake layers are completely cool, place one layer on a serving plate. Spread a layer of frosting on top, then place the second layer on top. Frost the entire cake generously.
Using a knife, gently carve the cake into a paw shape. Use the frosting to create depth and add the chocolate melts and fondant pieces to form the paw pads.
Add the graduation caps on top and any additional decorations. Slice and serve to your guests, enjoying all the smiles!
Extra Tips
- For extra flavor, consider adding a dash of espresso powder to the chocolate batter. This enhances the chocolate flavor without being overpowering.
Nutritional Breakdown (Per Serving)
- Calories: 380 kcal
- Total Fat: 26g
- Saturated Fat: 15g
- Cholesterol: 195mg
- Sodium: 85mg
- Total Carbohydrates: 32g
- Dietary Fiber: 3g
- Sugars: 24g
- Protein: 6g